
Your turn · exercise 1
Pause and list your live projects
Checking Pulse's suggestions is the most important set-up step. A list made from your own knowledge makes that check quick and reliable.
Saved on this device only. Nobody else sees it.
Knowledge check
Three quick questions
Lesson notes (the full written lesson)
Setting up Pulse doesn’t take long, and you don’t need to prepare much in advance. This lesson walks through each step in order, with a few tips on getting it right first time.
Before you start
Have these to hand:
- Your practice details (name, address, the people on your team and their roles)
- A login for your practice email (Microsoft 365 or Google) with permission to connect apps
- Your Dropbox login, if you keep project files there
- A list of your live projects, roughly, so you can check what Pulse finds
It helps to set aside an uninterrupted half hour for the first session, so you can check the suggested projects properly.
Step 1: open your onboarding link
Your onboarding link arrives by email. It takes you to set up your practice account. Use the email address you want to sign in with day to day.
Step 2: set up your practice
Add your practice details and the people on your team. This is what Pulse uses to know who works on what, and who the director dashboard and My Day are for.
Step 3: connect your email and files
Connect Microsoft 365 or Google, and Dropbox if you use it.
Once connected, Pulse reads the last 90 days of work. From that it builds a picture of what you’ve been working on and suggests the projects it has found.
A few things worth knowing:
- Connecting email is optional. Pulse is more useful with it, because filing, drafting and decision capture all depend on it. But you can start without it.
- Pulse never sends email without your approval. It drafts replies, chasers and client updates. You review, edit and press send.
- You decide what goes in. If a client would rather their project wasn’t in Pulse, keep that project out.
Step 4: check your projects
This is the most important step. Pulse suggests projects from what it has read. Go through each one and either confirm it, correct it, or remove it. You can also add projects of your own that Pulse didn’t find.
Projects in Pulse are organised by RIBA Stages 0 to 7, using the RIBA Plan of Work 2020. For each project, check:
- The name and client are right.
- The current stage matches where the project really is.
- Nothing is merged that should be separate (two jobs for the same client, for example).
- Nothing is missing that you’d expect to see.
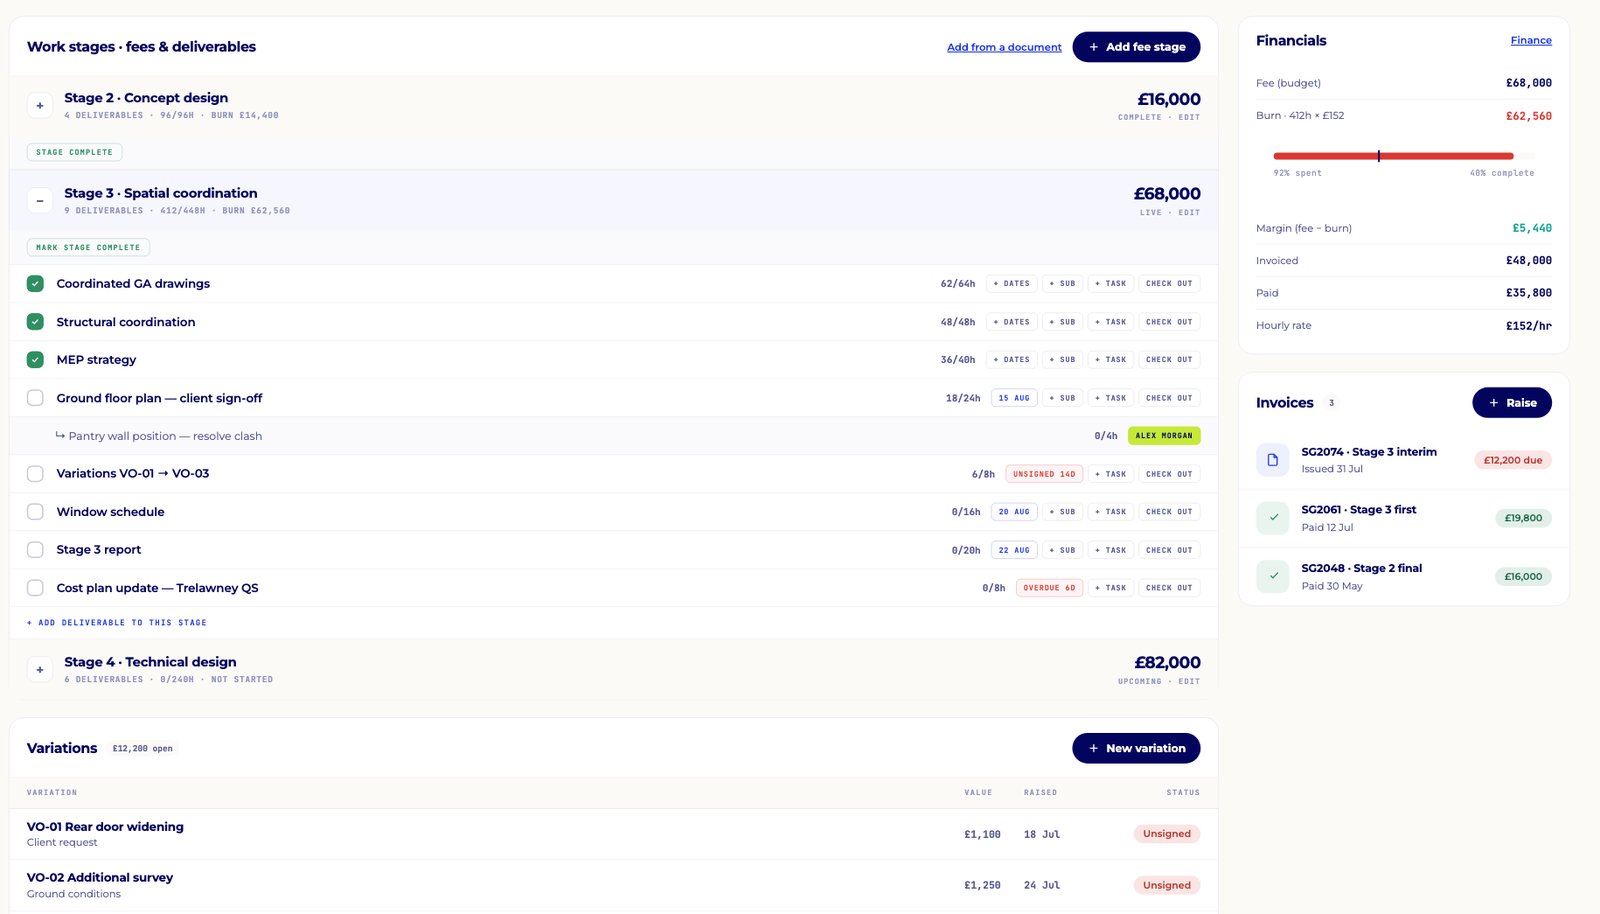
Projects from a fee letter
For a new project, you can upload the signed fee letter or forward the email that contains it. Pulse builds the project from it: RIBA stages, deliverables, fees per stage, dates and dependencies. Each item comes with a confidence score so you can see what to check most carefully. Lesson 3 covers this in detail.
A quick checklist for each project
- Client name and contacts correct
- Stage correct
- Deliverables and fees match the fee letter, if you’ve added one
- Low-confidence items checked
Step 5: invite your team
Invite everyone who works on projects. Each person gets their own login.
Don’t share accounts. Pulse builds each person’s My Day around their own meetings and tasks, and keeps a record of who did what. Shared logins break both, and they make it harder to keep client data secure.
When you invite people, it helps to tell them in person what Pulse is for and what you’d like them to try first. Lesson 2 gives a simple daily routine to suggest.
Step 6: invite a client, if you want to
Each client can have their own free portal, and you decide what each one sees. There is no need to do this on day one. Lesson 5 covers when and how, including telling clients about the new software before they get an invitation.
Your data
As the practice, you are the controller of your clients’ personal data and Pulse is the processor. Your data stays yours, and Pulse’s AI providers can’t use it to train their models. If you have questions about how data is handled, ask us before you connect anything.
Common set-up questions
| Question | Answer |
|---|---|
| Pulse found a project that’s finished. | Don’t confirm it. Only confirm the projects you want in Pulse. |
| Two jobs have been treated as one. | Correct it during the check, adding the second project yourself if you need to. This is exactly what the check is for. |
| A project is at the wrong stage. | Change it. Getting the stage right matters for fee tracking. |
| Something isn’t working as expected. | Use the Report button. See Lesson 6. |
Try this week
- Complete all six steps, or as far as Step 5, and check every suggested project’s stage.
- Invite at least one colleague and ask them to log in and look at their own My Day.
- Note anything Pulse got wrong during set-up and report it. It helps us improve the suggestions.
Key takeaways
- Set-up follows six steps: onboarding link, practice details, connections, projects, team, and clients if you want
- Pulse reads the last 90 days of email and files and suggests the projects it finds
- Check every suggested project and its RIBA stage before you rely on it
- Everyone gets their own login: never share accounts